![]()
CREATING
A NEW TRACK
(page 2)
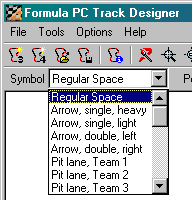
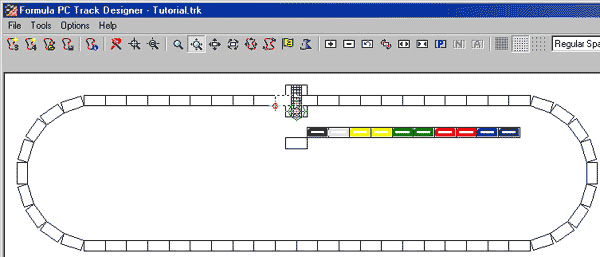
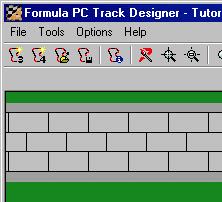
Whew! Okay, now that our rundown of the interface is complete, let's take a look at some of the initial data that was automatically generated when we chose New 3-Lane Track..
THE INITIAL DATA
|
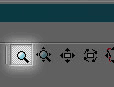
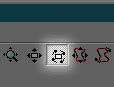
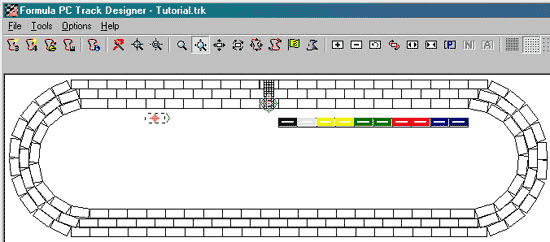
Click on the Zoom Mode button on the toolbar. |
|
Now when you click on the track spaces in the view window, they become selected (this is what has been, and will be, referred to as the "currently-selected space") but if you click and drag, the view zooms in and out.
This is true with most of the tools on the toolbar, so you can stay in the mode you prefer (I tend to stay in Pan Mode so I can cruise around the view quickly) and you can still select spaces for editing.
|
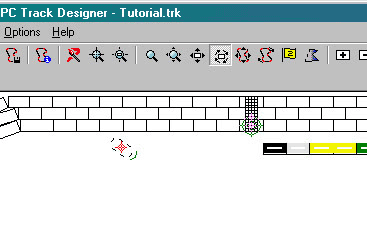
Now click on any of the spaces that the Track
Designer automatically created. |
|
|
Also notice the status bar at the bottom of the screen. It keeps current information on the state of editing and the properties of the current space. |
|
Let's start putting those tools to work!
LAYING OUT THE TRACK
Typically it's best to
start editing the Middle lane first. Since the Left and Right lanes will
often require tweaking in the corners, depending on whether they are on the
inside or outside, it's best to use the middle lane as a "backbone"
for the track layout.
In this case, since we're going to build a simple oval, things won't be too tricky, but as you advance to more intricate tracks, you'll learn how difficult it can be to get the inner and outer circumferences of corners just right.
|
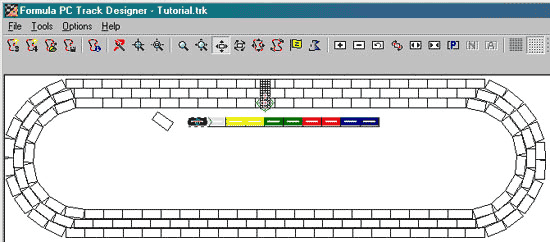
Let's start by selecting the 2nd space of the Middle lane. |
|
|
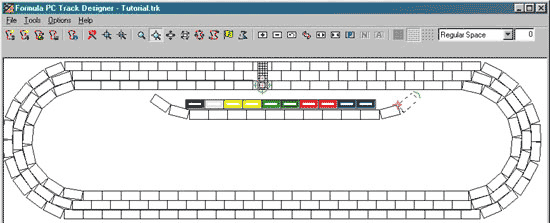
Now, let's lay down a few spaces on our track. Add spaces by
pressing the Add Space button on the toolbar, pressing Add 10 or so spaces. |
|
Notice that the spaces are added in the direction of the Track Vector (green arrowhead).
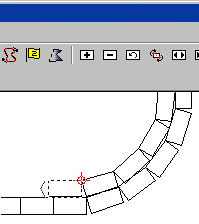
Now that we have a few spaces for our straight, let's start creating the first corner.
|
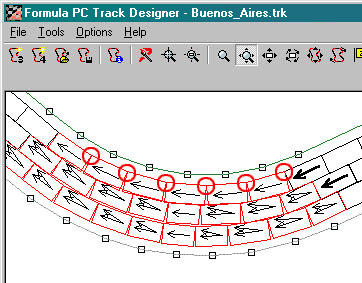
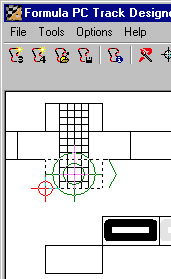
If the track is curving to the left then spaces will connect on the left side. Notice the corner where each curve connects, this is the location where you want to place the Center of Rotation before you rotate each space that makes up the curve. |
|
|
Before we start creating our first corner, let's move the Space Center of Rotation so that it is on the vertex that will be shared by the two spaces. Click on the Change Space COR button on the toolbar. |
|
|
If the COR was in the center of the space (default) then you will need to click the button 4 times to get it to the lower left of the current space. Once the COR has been placed in the correct location, we can rotate the space. |
|
It's usually a good idea to have a plan for your corners, knowing how many spaces you want the corner to be comprised of and how many degrees total you want the track to curve is often essential. This way you will know how many degrees each space needs to be rotated to hit your final objective.
We know that our corner is going to cover 180°, and let's say we want the middle lane of the curve to be 10 spaces long. This means each space will need to be rotated 18°.
|
To rotate to 18° we'll need the grid precision set to fine (so that we can rotate in 1° increments), so make sure the Fine Grid button is depressed on the toolbar. |
|
|
Now click on the Rotate Space Mode button on the toolbar. |
|
|
Click and drag in the view window. Dragging to the right will rotate the current space to the right, and dragging to the left will rotate likewise. Rotate the space until it the status bar reads: "Ang:18°" |
|
|
Right-click in the view window (or press |
|
We need to continue this for 9 more spaces.
Notice that the COR remains at the same place (on the new space), so we don't
have to modify its location, we simply have to rotate each new space.
Click and drag to the right again until the status bar reads: "An:36°"
(18+18=36).
Add the space and continue on.
Rotate each space another 18° from the previous one.
(18°, 36°, 54°, 72°, 90°, 108°, 126°, 144°, 162°, 180°).
|
Once all the spaces are complete you should have a half-circle that is pointing to the left, 180° from the direction in which we started. |
|
Congratulations! You've got the makings of your first corner.
|
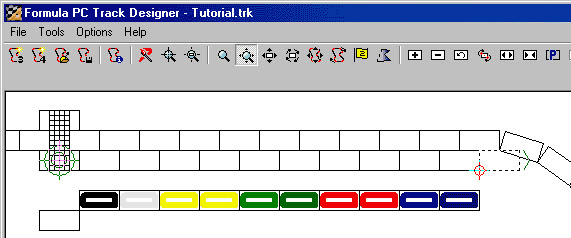
Add spaces again to create the second straight, this time let's make it 20 or so. |
|
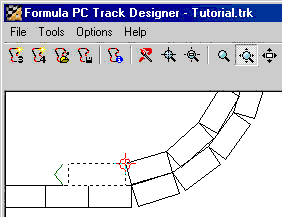
Now we have our second straight.
Again we'll need to create a corner, and again this corner will curve to
the right. It will be comprised of 10 spaces that cover 180°, so create each
space and then rotate it 18° more than the last one.
(198°, 216°, 234°, 252°, 270°, 288°, 306°, 324°, 342°, 0°)
Our COR should still be in the proper spot, so we shouldn't need to modify
it, just rotate a space, add it, rotate the next space, add it, etc. until you
end up with a space a 0°.
|
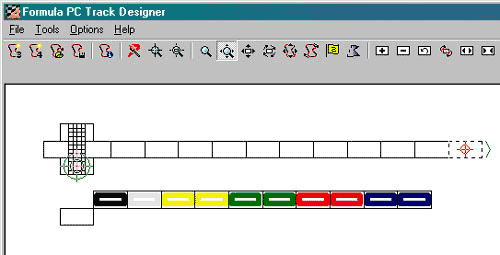
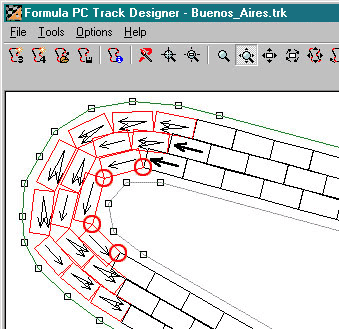
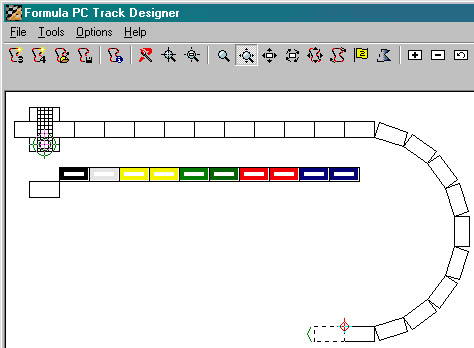
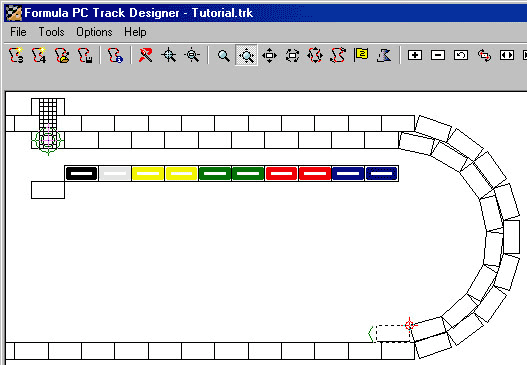
Now we have a track with part of one straight, a complete first corner, a complete second straight and a complete second corner (for the middle lane anyway). |
|
|
To complete the first straight, add spaces until the end of the
middle lane meets the start that was automatically generated by
the Track Designer. |
|
With that, we have the "backbone" of our track, one lane completely laid out.
Now it's time to create the Left and Right lanes.
|
Click on the first space of the Right lane. |
|
|
Add spaces until you reach the first corner. This should be 10 spaces, if that's the number you added when creating the Middle lane. Notice that the last space overlaps the first corner space of the Middle lane. We will now rotate the Right lane space to conform to the corner. The angles for spaces on the Right lane don't need to be as exact as the ones we set up for the Middle lane, which is why we built the Middle lane first, to use it as a guide. |
|
Just rotate each space until it sits against, but doesn't overlap, those
on the Middle lane.
For reference, I added 9 spaces to create the first corner on the Right
lane, the angles I used were as follows:
12°, 31°, 53°, 77°, 96°, 121°, 137°,
164°, 180°
|
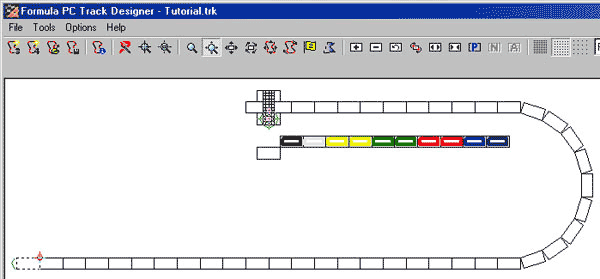
This leaves us with a complete first corner on the Right lane. |
|
|
Something to note is the alignment of the spaces now that the first corner
is complete for 2 lanes. |
|
|
But the current space on the Right lane is not offset correctly. Rather than being at 1/2, it is more like 1/5. |
|
|
To correct this we can use the Increase Space Length button on the toolbar. |
|
|
Click on the Increase Space Length button and you will see the space increase in size. Notice that the Space Length value increases on the Status Bar as well. |
|
|
Setting the space length to 1.3 aligned it to the midpoint of the spaces on the Middle lane, at least enough for my satisfaction, so now it's time to add spaces to create the Right lane of the second straight. |
|
|
Just add spaces using your favorite method (Toolbar, Right-click or |
|
|
Again, add spaces to create the second corner, rotating each one so that it conforms to the curve. Once the corner is complete, you may need to adjust the length of the last space, just as we did a moment ago. When the corner is complete, add spaces to finish the straight, bringing the Right lane back to the Finish Line. |
|
|
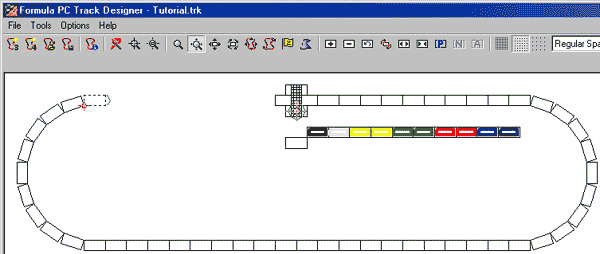
Creating the Left lane is basically the same process as the Right. Select the first space, add spaces to create the straight until you reach the corner, create the corner, etc, etc. Once you have the Left lane laid out your track should look similar to this: |
|
Note that getting the Left lane "just right" may involve tweaking
the rotations and space lengths. Play with the different tools, increasing or
decreasing the space sizes and their rotations until you're happy with the layout.
Once all of the main lanes are complete, we can deal with the Pit lane.
The Track Designer automatically creates the first space of the Pit lane
and it creates the 10 Garages but you'll notice that the Pit in-out (or "Pit
Paint" as I call them) spaces are not created. This is due to the fact
that the Track Designer doesn't know how many spaces will occur before the Pit
lane reaches the first "painted" space.
First, look at how far to the left the Pit lane and Garages are located.
We don't really have enough room to create a Pit exit with things the way they
are now, If we tried to we'd end up connecting the Pit lane to the first corner.
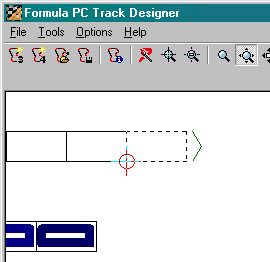
|
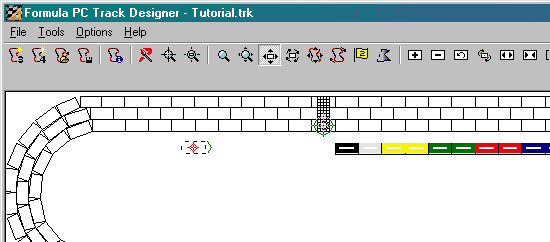
This is a great time for us to try out the Translate Space Mode
button. |
|
|
Once you're in Translate Space Mode, select the first space of the pit lane. |
|
|
Click and drag in the view window to move the space. Try dragging it to the left, and placing it near the Right lane, something like this: |
|
|
This space will be the Pit Entrance, so it needs to be angled to bring cars off of the track. Select Rotate Space Mode and rotate the space so that looks something like this: Don't be concerned with the exact angle of the space, or having it located precisely. Formula PC has routines built in that automatically joint the Pit Entry and Pit Exit to the Right lane, they'll take care of creating the smooth transition. |
|
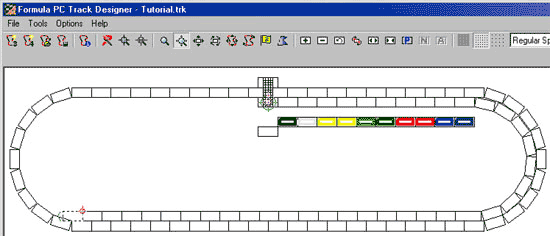
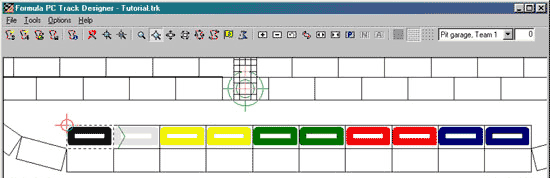
Now, let's move the Garages to the left, closer to the Pit Entry.
Don't worry
about exactly where you put them, we're just getting them out of the way so
we can build a Pit lane and Pit Exit. We'll place the Garages exactly where
we want them in a moment.
|
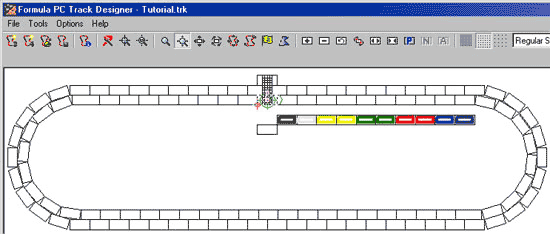
Start by choosing Translate Space Mode again, then select the first Garage (it's the one on the left, filled with Black) and drag is to the left. Notice
that dragging the first Garage causes all following Garages to move with it.
This is true for all operations on all spaces. If you move, rotate
or reset a space, the spaces following are also affected. To only
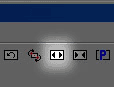
affect the currently-selected space, press |
|
|
Now, select the first space of the Pit lane again. We will now build the entire Pit lane up to the Pit Exit that will connect the Pit to the Right lane. Simply add spaces until the pit lane stretches past the last (dark blue) Garage, then rotate the last space so that it is angled toward the Right Lane. |
|
|
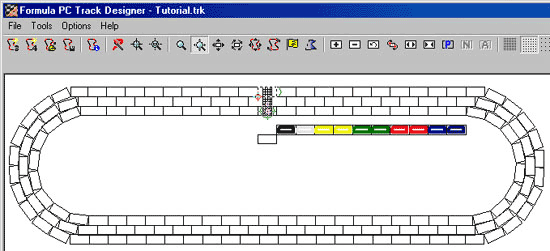
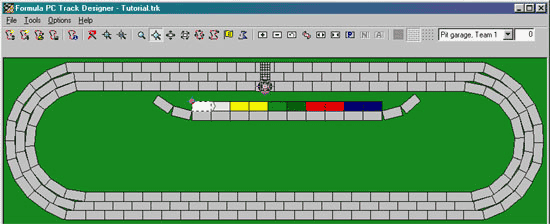
The last thing to do in terms of lane/space creation is to move the Garages so that they are nestled up against the Pit lane. In Translate Space Mode, select the first Garage again and then drag it so that it sits again the Pit lane, like this: |
|
And with that, congratulations are in order, you've completed the first step in creating a Formula PC Track, the layout!
|
For a bit of extra celebration, go to the Tools menu and press the Draw Filled
Polygons command (or simply press |
|
That completes the creation of the track
layout.
Next Page of the Tutorial
Return
to the Contents page
CONTACT:
If you have any questions or comments, please feel free to contact
me: onyx@malagraphixia.com
Formula PC ©2000-2001 ONYX (J Boen) This page
and all items pertaining to Formula PC
are in no way related to or endorsed by EuroGames, the makers of Formula Dé.